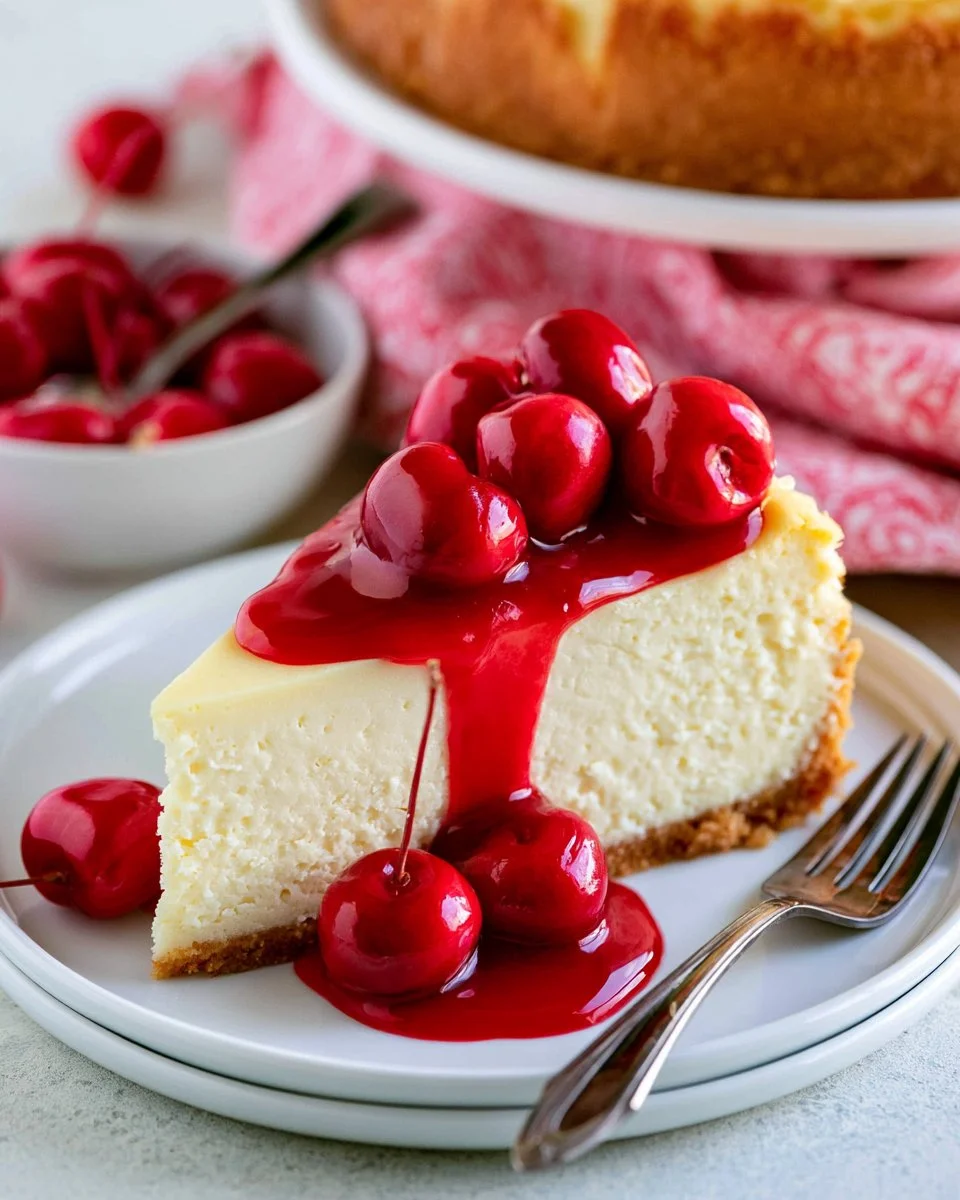
New York Style Cheesecake
If you’re looking for the ultimate indulgence, look no further than New York Style Cheesecake. This iconic dessert is known for its rich and creamy texture, making it the perfect treat for any occasion. Originating from the bustling streets of New York, this cheesecake has become a favorite across the United States and beyond. With its simple ingredients and straightforward preparation, making a New York Style Cheesecake at home is achievable for bakers of all levels.
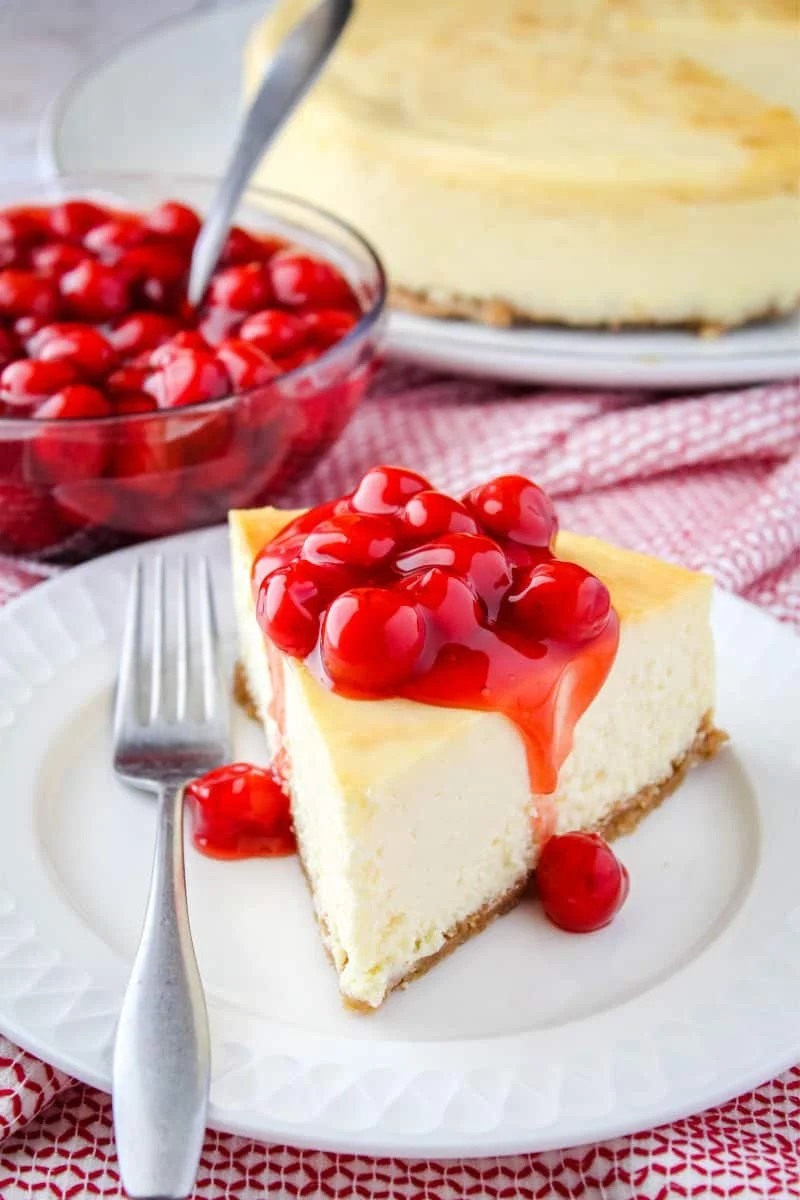
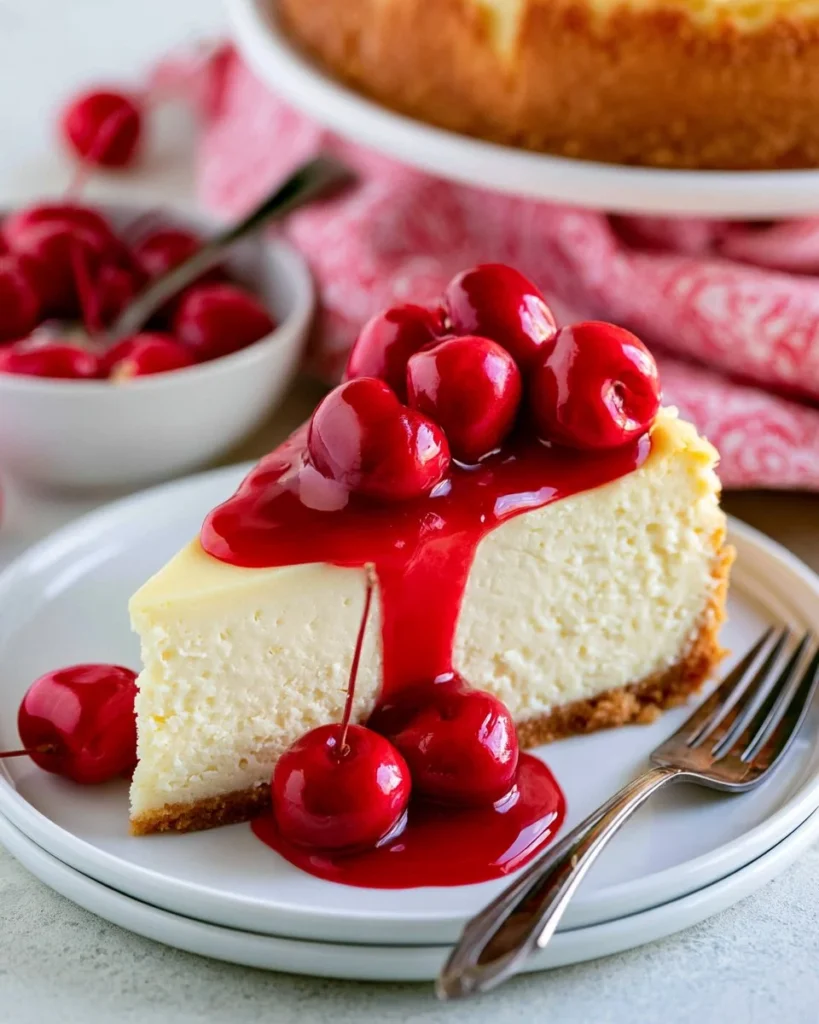
Unlike its lighter counterparts, this cheesecake embodies a dense and velvety consistency that melts in your mouth. Topped with a luscious cherry pie filling, it’s not only visually stunning but also offers a perfect sweet-tart balance. Whether you’re celebrating a special event or simply craving a delicious slice, this cheesecake delivers pure satisfaction.
In this article, we will guide you through every step of the process, from gathering your ingredients to serving up slices of this delightful dessert. When properly crafted, New York Style Cheesecake will impress your friends and family alike and may even become your go-to dessert recipe!
Quick Answer
The New York Style Cheesecake is a rich, dense dessert made with cream cheese, eggs, and a graham cracker crust, traditionally topped with cherry pie filling. It’s perfect for special occasions or any time you crave something sweet!
Why You’ll Love This Recipe
This New York Style Cheesecake is a classic that checks all the boxes. Its smooth and creamy consistency, combined with a buttery graham cracker crust, creates a heavenly dessert experience. The creamy filling melts in your mouth, making every bite a delight. Moreover, the convenience of using straightforward ingredients means you can whip it up whenever you’re in the mood for something sweet. The addition of cherry pie filling adds a pop of color and flavor that elevates the cheesecake to a whole new level. This dessert is not only delicious; it’s also visually appealing, making it ideal for serving at gatherings. Impress your guests with a homemade cheesecake that tastes like it’s straight from a New York bakery!
What Makes This Recipe Special
This recipe stands out for its authenticity and simplicity. The classic combination of cream cheese, eggs, and sugar produces a decadent filling that embodies what a traditional New York Style Cheesecake should be. The graham cracker crust is perfectly crisp, offering a delightful contrast to the smooth filling. What sets this cheesecake apart is its baking method—using a water bath ensures even cooking and helps prevent cracks, resulting in a polished dessert. This attention to baking technique showcases the careful craftsmanship that truly makes this cheesecake a beloved staple for dessert enthusiasts. The flavor profile is robust yet subtle, allowing you to savor the quality of the ingredients. Each slice is not just a dessert; it’s an experience that celebrates the nuances of flavor and texture.
Kitchen Tools You’ll Need
- Springform pan: Essential for easy removal of the cheesecake once it’s set.
- Mixing bowl: Needed for combining ingredients smoothly.
- Electric mixer: For beating the cream cheese mixture until creamy.
- Roasting pan: Used to create a water bath for even baking.
- Measuring cups: To ensure accurate ingredient proportions.
- Spatula: Helpful for spreading the cheesecake filling evenly.
- Knife: For running around the edges after baking to prevent sticking.
Ingredients
- Graham crackers: Forms the base for a buttery crust.
- Granulated sugar: Adds sweetness to the crust and filling.
- Salt: Enhances the overall flavors of the cheesecake.
- Unsalted butter: Binds the crust together for a rich taste.
- Cream cheese: Provides the signature creamy filling.
- All-purpose flour: Helps stabilize the cheesecake structure.
- Eggs: Necessary for adding richness and setting the filling.
- Vanilla extract: Infuses the filling with a warm, comforting flavor.
- Lemon: The zest brightens and enhances the cheesecake’s taste.
- Sour cream: Adds creaminess and a slight tang to the filling.
- Cherry pie filling: Optional topping that adds color and flavor.
How to Make New York Style Cheesecake
STEP 1. Preheat the oven. Set your oven to 375 degrees F. Prepare a 9-inch or 10-inch springform pan by wrapping the outside with heavy-duty foil and spraying the inside with non-stick cooking spray.
STEP 2. Prepare the crust. Crush the graham crackers into crumbs and mix them with sugar and salt. Stir in melted butter and press the mixture into the bottom of the prepared pan, then bake for 10 minutes. Lower the oven temperature to 325 degrees F.
STEP 3. Mix the filling. In a bowl, beat together cream cheese, sugar, and flour until the mixture is well-combined. Add eggs, vanilla, lemon zest, and sour cream, mixing until smooth and creamy.
STEP 4. Assemble the cheesecake. Pour the filling into the crust and spread it evenly. Place the springform pan in a roasting pan filled with water up to 1 inch on the sides. Bake for 1 hour and 30 minutes.
STEP 5. Cool the cheesecake. Remove the cheesecake from the oven and let it sit in the warm water for 45 minutes.
STEP 6. Finish and chill. Remove the cheesecake from the water bath, take off the foil, and run a knife around the edge to release it from the pan. Chill in the refrigerator for at least 8 hours. Cut into slices and top with cherry pie filling if desired.
Why This Recipe Works
This New York Style Cheesecake recipe works seamlessly due to the carefully selected ingredients and technique. The use of room temperature cream cheese ensures a smooth and lump-free filling, essential for that signature creamy texture. The baking method, particularly the water bath, is key in preventing cracks and maintaining moisture, resulting in a perfect bake every time. Including roles for each ingredient—like eggs and sour cream—provides a balanced structure and flavor. The graham cracker crust, baked separately, provides a delightful crunch that pairs perfectly with the creamy filling. This harmonious blend of textures and flavors in a tried-and-true method guarantees that you’ll end up with a cheesecake that not only looks incredible but tastes fantastic as well.
Pro Tips for Best Results
- Ensure all ingredients are at room temperature before beginning for a smoother batter.
- Don’t overmix the batter; too much air can lead to cracks while baking.
- Wrap your springform pan with foil tightly to prevent water from seeping in during the water bath.
- Consider baking the cheesecake a day in advance to enhance its flavor as it chills overnight.
- Use a sharp knife to cleanly slice the cheesecake and prevent crumbling.
Common Mistakes to Avoid
- Using cold cream cheese: Always let it come to room temperature for an even mixture.
- Skipping the water bath: This step is crucial for a creamy texture and to prevent cracks.
- Over-baking: Keep an eye on the time; remove it when it’s just set in the center.
- Not chilling long enough: Allow at least 8 hours in the fridge for the best flavor and texture.
- Forgetting to run a knife around the edges: This helps release the cheesecake from the pan without damage.
Recipe Variations
While the classic New York Style Cheesecake is always a crowd-pleaser, there are plenty of variations to explore! For a chocolate twist, add melted chocolate to the filling for a rich flavor. If you’re looking to incorporate fruit, swirl some pureed berries or use a lemon curd for a citrusy kick. Nut crusts, such as almond or pecan, can replace graham crackers for a unique taste and texture. For the adventurous, try a pumpkin cheesecake variation during fall with added spices for a seasonal touch. Lastly, consider a no-bake option for a lighter version that utilizes whipped cream instead of eggs and baking.
Nutrition Highlights
| Nutrient | Amount per serving |
|---|---|
| Calories | 450 |
| Protein | 6g |
| Fat | 30g |
| Carbohydrates | 40g |
| Sugar | 24g |
| Sodium | 210mg |
How to Serve New York Style Cheesecake
Serving New York Style Cheesecake is as simple as slicing up the chilled dessert and presenting it on a beautiful plate. Consider adding a dollop of whipped cream beside each slice for an extra touch. For a pop of color and flavor, top with cherry pie filling or fresh berries. A sprinkling of powdered sugar can add a lovely presentation as well. Pairing the cheesecake with a hot cup of coffee or a glass of dessert wine can enhance the overall experience. No matter how you choose to serve it, this cheesecake is sure to be the star of any dessert table!
Best Occasions for This Recipe
This decadent New York Style Cheesecake is versatile enough for almost any occasion. It’s perfect for holiday gatherings, birthdays, or anniversaries where a show-stopping dessert is a must. Serve it at potlucks and family dinners to impress your loved ones. It also makes a lovely treat for a casual weekend brunch or an afternoon with friends. The versatility of this cheesecake ensures it fits any celebration, large or small.
Make Ahead & Storage
Making the New York Style Cheesecake ahead of time is a fantastic idea! It actually tastes better when allowed to chill overnight, letting flavors develop. Here’s how to store it properly for the best results:
Meal Prep
You can prepare the cheesecake crust and filling a day before serving. Simply follow the recipe, then cover and refrigerate instead of baking right away.
Refrigeration
After baking and cooling, keep the cheesecake in the refrigerator covered with plastic wrap or in an airtight container. It will stay fresh for about 5 to 7 days.
Freezing
If you’d like to make the cheesecake further in advance, it can be frozen. Wrap it tightly in plastic wrap and place it in an airtight container. Thaw it in the refrigerator overnight before serving.
Reheating
While cheesecake is best served chilled, if you prefer it warmed slightly, place a slice in the microwave for about 10 seconds. Be cautious not to overheat, as it can affect the texture.
FAQs
Can I use a different type of pan? Yes, while a springform pan is recommended for easy removal, you could use a regular cake pan. Just make sure to line it properly for easier removal.
What if my cheesecake cracks? Cracking can occur for several reasons, such as overmixing or baking too long. Using a water bath helps prevent this issue.
Is it necessary to use sour cream? While sour cream adds creaminess and tang, it can be substituted with Greek yogurt for a similar effect.
Can I make it without eggs for dietary restrictions? There are egg substitutes that can work, but the texture may differ. Look for recipes specifically designed for egg-free cheesecake.
How do I know when the cheesecake is done? The cheesecake should be set around the edges but a bit jiggly in the center. It will firm up as it cools.
Save This Recipe for Later
Don’t forget to bookmark this New York Style Cheesecake recipe! It’s a perfect go-to dessert for any occasion and will only become more cherished as you make it for future gatherings.
Final Thoughts
Indulging in New York Style Cheesecake is an experience worth savoring. With its rich texture, delicious flavor, and beautiful presentation, this dessert is sure to leave a lasting impression. Follow this recipe for a dependable and delightful cheesecake that is sure to become a staple in your dessert repertoire. Enjoy every creamy slice!
New York Style Cheesecake
Ingredients
Method
- Preheat the oven to 375°F (190°C). Prepare a 9-inch or 10-inch springform pan by wrapping the outside with heavy-duty foil and spraying the inside with non-stick cooking spray.
- Crush the graham crackers into crumbs and mix with sugar and salt. Stir in melted butter and press the mixture into the bottom of the prepared pan. Bake for 10 minutes and lower the oven temperature to 325°F (163°C).
- In a bowl, beat together cream cheese, sugar, and flour until well-combined. Add eggs, vanilla, lemon zest, and sour cream, mixing until smooth and creamy.
- Pour the filling into the crust and spread it evenly. Place the springform pan in a roasting pan filled with water up to 1 inch on the sides. Bake for 1 hour and 30 minutes.
- Remove the cheesecake from the oven and let it sit in the warm water for 45 minutes.
- Remove the cheesecake from the water bath, take off the foil, and run a knife around the edge to release it from the pan.
- Chill in the refrigerator for at least 8 hours before serving.
- Cut into slices and top with cherry pie filling, if desired.