Gluten-Free Sandwich Bread
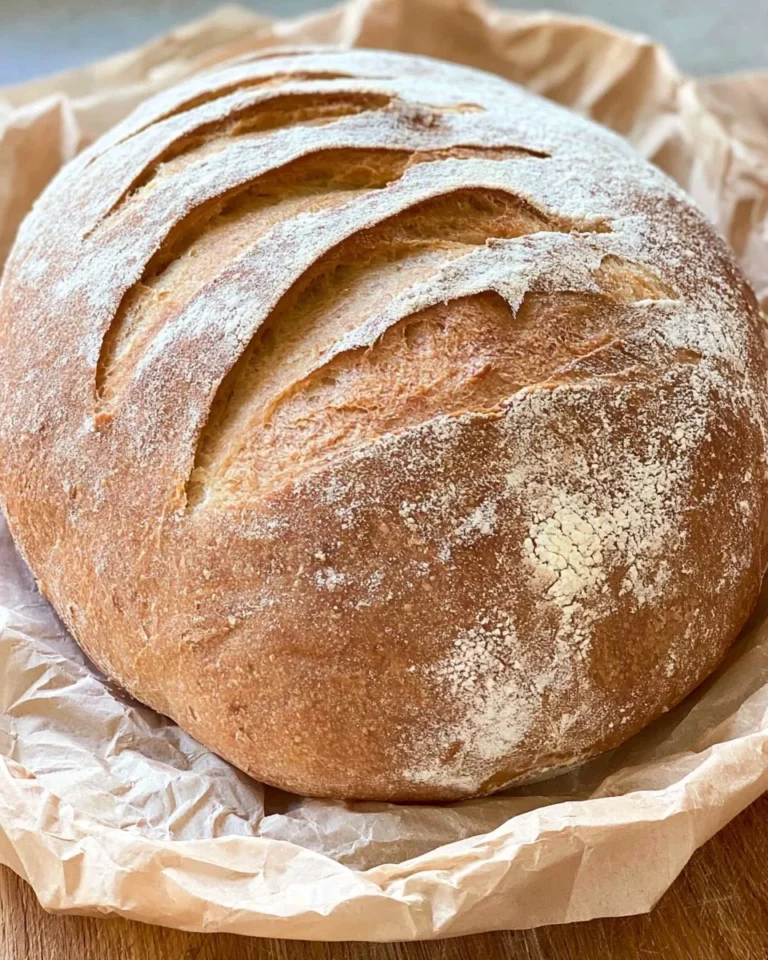
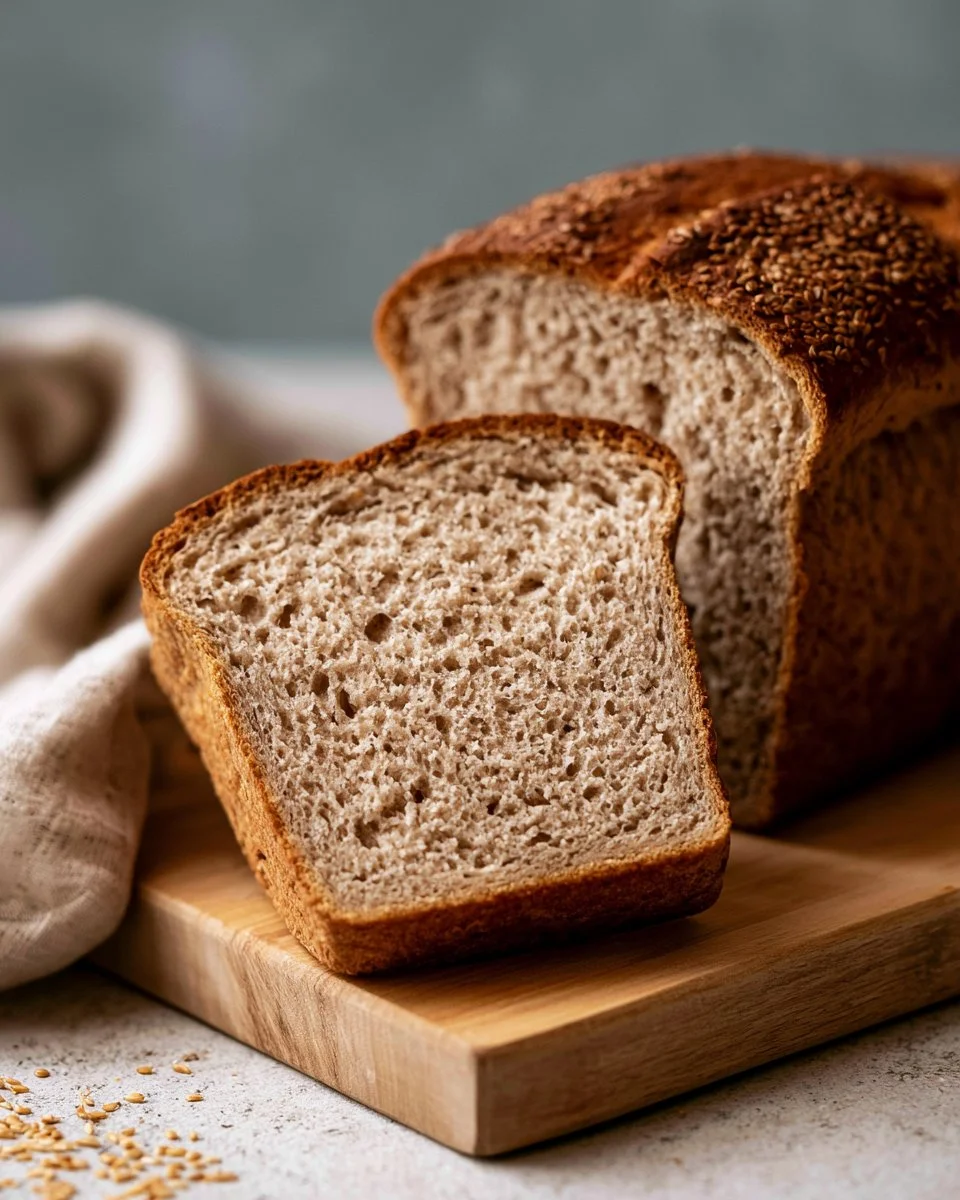
Imagine slicing into a warm, freshly baked loaf of bread, its crust golden and slightly crispy while the inside remains soft and light. Gluten-free bread often gets a bad rap for being dry or crumbly, but this recipe promises to change that perception. With a delightful blend of gluten-free oats, brown rice flour, and a touch of psyllium husk, this sandwich bread is structured yet tender, making it perfect for toast, sandwiches, or simply slathering with your favorite spread. The aroma that wafts through your kitchen as it bakes is comforting and inviting, setting the stage for a delightful eating experience.
Each bite reveals a scrumptious flavor that is enhanced by the subtle sweetness of maple syrup and the richness of olive oil. Whether you’re gluten-sensitive or simply seeking a healthier bread alternative, this recipe is your answer. It’s easy to prepare, and the long cooling time may just be the hardest part of the process, as you’ll be tempted to slice into it straight away! Perfect for family meals, packed lunches, or breakfast, the versatility of this loaf is endless, so get ready to become the hero of your kitchen.
Why You’ll Love This Recipe
This gluten-free sandwich bread is not just a gluten-free alternative; it’s a delicious, wholesome addition to any meal. The combination of gluten-free oats and flour creates a gorgeous texture that’s both hearty and light, making it perfect for all your favorite fillings. It’s also packed with nutrients, ensuring that you’re giving your body the best without sacrificing taste.
For those looking to incorporate more fiber into their diets, the addition of psyllium husk contributes to both texture and gut health. With minimal effort and some waiting time, you’ll find this recipe fits seamlessly into your routine, providing a nourishing option that you can feel good about serving. Whether you’re having a cozy breakfast, a quick lunch, or a casual dinner, this gluten-free bread always delivers.
What Makes This Recipe Special
What sets this recipe apart is the innovative use of everyday gluten-free ingredients that deliver extraordinary results. The blend of oats, brown rice flour, and starches creates a wonderful sandwich base that’s both filling and satisfying. Psyllium husk is a standout for its ability to bind ingredients together, mimicking the texture of traditional bread without the gluten.
Moreover, the process of making this bread is straightforward and achievable for any home cook, regardless of experience level. The key lies in allowing time for chilling and resting, which enhances the flavors and textures even further. The result is a loaf that is not only gluten-free but surprisingly similar to its gluten-containing counterparts, dispelling any notions of unappetizing gluten-free bread.
Ingredients
gluten-free oats: Ground into flour, they offer healthy fiber and a great base for the bread.
psyllium husk: A crucial binding agent that adds structure and moisture to the bread.
soy milk: Provides moisture and helps activate the psyllium husk.
brown rice flour: Offers a nutty flavor and adds to the overall texture.
potato starch: Lightens the bread and improves the chewiness.
tapioca starch: Adds elasticity and helps create a nice crust.
instant yeast: Enables the bread to rise beautifully, giving it volume.
salt: Enhances flavor and plays a vital role in yeast activation.
baking powder: Provides additional leavening for a light texture.
maple syrup: A natural sweetener that enriches flavor and moisture.
olive oil: Adds richness and helps keep the bread moist.
apple cider vinegar: Enhances flavor and aids in the bread’s rise.
How to Make Gluten-Free Sandwich Bread
STEP 1. Blend the oats. Add gluten-free oats to a high-speed blender and process until they resemble flour, with a few larger pieces remaining.
STEP 2. Prepare the psyllium gel. Warm soy milk to 110ºF (43ºC), then combine with psyllium husk in a bowl and mix well. Let it sit until it thickens to a runny oatmeal consistency.
STEP 3. Mix dry ingredients. In the bowl of a stand mixer fitted with the hook attachment, combine brown rice flour, oat flour, potato starch, tapioca starch, baking powder, and salt. Stir until well mixed, then add instant yeast and mix again.
STEP 4. Incorporate wet ingredients. Add the psyllium gel, maple syrup, olive oil, and vinegar to the flour mixture. Stir on low speed until the dry ingredients are incorporated, scraping the bowl as needed.
STEP 5. Mix the dough. Increase the speed to medium-low and mix for 5 minutes until smooth and combined.
STEP 6. Rest the dough. Allow the dough to rest for 10 minutes in the bowl.
STEP 7. Knead the dough. Turn the dough onto a lightly floured surface and knead gently until forming a smooth circle.
STEP 8. Shape the loaf. Pat dough into a rectangle as wide as the bread pan and roll up into a log, tucking ends under, then place in a Pullman pan.
STEP 9. Let it rise. Cover the dough and let it rise in a warm place until doubled in size, about 1 hour.
STEP 10. Preheat the oven. Place a pan of water on the bottom rack of your oven and preheat to 400ºF (204ºC).
STEP 11. Bake the bread. Once the dough has risen, place it in the oven, reduce the temperature to 375ºF (190ºC), and bake for 30 minutes with steam, avoiding door openings.
STEP 12. Finish baking. Remove the steam pan after 30 minutes and continue baking for another 20-30 minutes until the internal temperature reaches at least 205ºF (96ºC).
STEP 13. Cool completely. Remove the loaf from the oven and let it cool completely before slicing; ideally letting it cool overnight for best texture.
Pro Tips
To ensure your gluten-free bread turns out perfectly every time, consider the following expert tips. Using a high-speed blender to make your oat flour gives you a fine consistency, which is important for the overall texture. Be sure to warm your soy milk accurately to the proper temperature, as this activates the psyllium husk’s binding properties.
Don’t skip the resting time; allowing the dough to sit enhances its flavor and structure. As you knead the dough, go gently to avoid overworking the mixture, which can lead to a denser loaf. For the best rising results, be mindful of the warm environment; if your kitchen is cool, consider placing the dough in a turned-off oven with the light on to create warmth.
Monitor the baking process closely; every oven can vary in temperature. A digital instant-read thermometer is invaluable for checking doneness, ensuring your bread is perfectly baked without being underdone. If the crust is too firm after baking, storing the bread in a closed bag will soften it to your preferred texture.
Common Mistakes to Avoid
To avoid pitfalls in your gluten-free bread-making adventure, keep these common mistakes in mind. First, ensure you use the correct gluten-free ingredients; substituting with regular flour will ruin the texture and make the bread inedible. Pay attention to the psyllium husk’s role—it’s essential for binding and can’t be omitted or swapped.
Don’t rush the rising time; gluten-free dough needs adequate resting to develop properly. Be patient when cooling your bread as well. Cutting into it too soon can lead to a gummy texture, which is a common disappointment. Always check your oven’s temperature; this bread requires precise baking to achieve a nice rise and a golden-crisp crust.
Additionally, avoid skipping the steaming component while baking. It’s vital for developing that lovely crust on the bread. Lastly, be aware of how you store it; keeping it airtight will help maintain freshness but can also affect the crust’s texture, so find a balance that works best for you.
Variations
• Use almond milk for a nutty flavor and a dairy-free option.
• Substitute honey for maple syrup for a different sweet profile.
• Add seeds like sunflower or sesame for added crunch and nutrition.
• Incorporate herbs or spices for flavor, such as garlic powder or rosemary.
Serving Ideas
This gluten-free sandwich bread is incredibly versatile and can be served in several delightful ways. Slice it thinly for hearty toast topped with avocado and poached eggs for a satisfying breakfast. Make delicious sandwiches filled with turkey, spinach, and your favorite condiments for an easy lunch. Pair toasted slices with homemade soups or stews for comfort food dinners that warm you up on chilly nights. You can also enjoy it as a quick, nutritious snack spread with almond or peanut butter and dressed with banana slices.
Meal Prep & Storage
For optimal meal prep, you can make this gluten-free sandwich bread in advance, allowing for easy meal planning throughout the week. Once cool, slice the loaf and store it in an airtight container in a cool, dry place for up to three days or in the refrigerator for about a week. For longer storage, consider freezing individual slices wrapped tightly in plastic wrap or in a freezer-safe bag.
When ready to enjoy, simply toast the slices directly from the freezer, and they’ll warm up beautifully. This method ensures you always have fresh bread at your fingertips without the hassle of daily baking, making it a fantastic addition to your healthy meal prep routine.
{image_template}
FAQs
Can I substitute different flours in this recipe?
Unfortunately, replacing the specified gluten-free flours and starches could significantly affect texture and rise. It’s best to stick to the recipe for successful results.
How do I know when the bread is done baking?
You can use an instant-read thermometer to check for doneness; an internal temperature of at least 205ºF (96ºC) indicates your bread is fully baked.
What can I do if the inside of my bread is gummy?
This often happens if the bread is sliced too soon. Allow the bread to cool completely, ideally overnight, before cutting into it.
Can I add mix-ins to this recipe?
Definitely! Enjoy experimenting with ingredients like nuts, seeds, or dried fruits to create a unique flavor profile.
Is there a vegan substitute for the egg in the recipe?
This recipe doesn’t require eggs, as the psyllium husk performs the binding function. Nonetheless, including flaxseed meal can enhance moisture and texture if desired.
What should I do if my dough doesn’t rise?
Make sure your yeast is active and fresh, and ensure the dough is kept in a warm environment while rising. Temperature plays a key role in the fermentation process.
Conclusion
This delightful gluten-free sandwich bread offers an innovative yet comforting solution for anyone seeking a gluten-free lifestyle without compromising flavor or texture. Its rich, satisfying taste and ease of preparation make it a wonderful addition to your recipe collection. Try it out, and each slice may just become a beloved staple in your home!
Gluten-Free Sandwich Bread
Ingredients
Method
- Blend the gluten-free oats until they resemble flour.
- Warm soy milk to 110ºF and mix with psyllium husk until thick.
- In a mixer, combine brown rice flour, oat flour, potato starch, tapioca starch, baking powder, and salt; mix well.
- Add the instant yeast to the dry ingredients and mix again.
- Incorporate the psyllium gel, maple syrup, olive oil, and vinegar to the flour mixture.
- Mix on low speed until fully incorporated, then increase speed and mix for 5 minutes.
- Rest the dough for 10 minutes in the bowl.
- Knead the dough gently on a floured surface to form a smooth circle.
- Shape the dough into a rectangle and roll into a log; place in a Pullman pan.
- Cover and let rise in a warm place for about 1 hour until doubled.
- Preheat the oven to 400ºF and place a pan of water on the bottom rack.
- Bake at 375ºF for 30 minutes with steam, then remove steam pan and continue baking for another 20-30 minutes.
- Ensure the internal temperature reaches at least 205ºF.
- Cool completely before slicing, ideally cooling overnight.